Saturday, April 12, 2014

Making Maple Syrup - Our Fourth Boil - April 11, 2014

Below is our log for our fourth week of sap collecting.

April 7 - 55 cups.  Weather:  High +15.6°C, low 0°C
April 8 - Rain storm.  Dumped sap out.  Weather:  High +11.5°C, low +4.7°C
April 9 - No sap - didn't go below zero last night.  Weather:  High +10.9°C, low +2.2°C
April 10 - 104 cups.  Weather:  High +7°C, low -4.1°C
April 11 - 29.5 cups.  Weather:  High +13.4°C, low +2.9°C

The grand total for our next boil was 188.5 cups, or 11.78 gallons.

This is what the sap looks like at the start of the boil:


And this is what it looks like after five or six hours of boiling:


We boiled for 7 hours, and since we didn't get started until the afternoon it went into the evening.  I ran an extension cord out to the sugar shack so we could put a lamp out there.  It ended up being about midnight by the time we got it bottled.


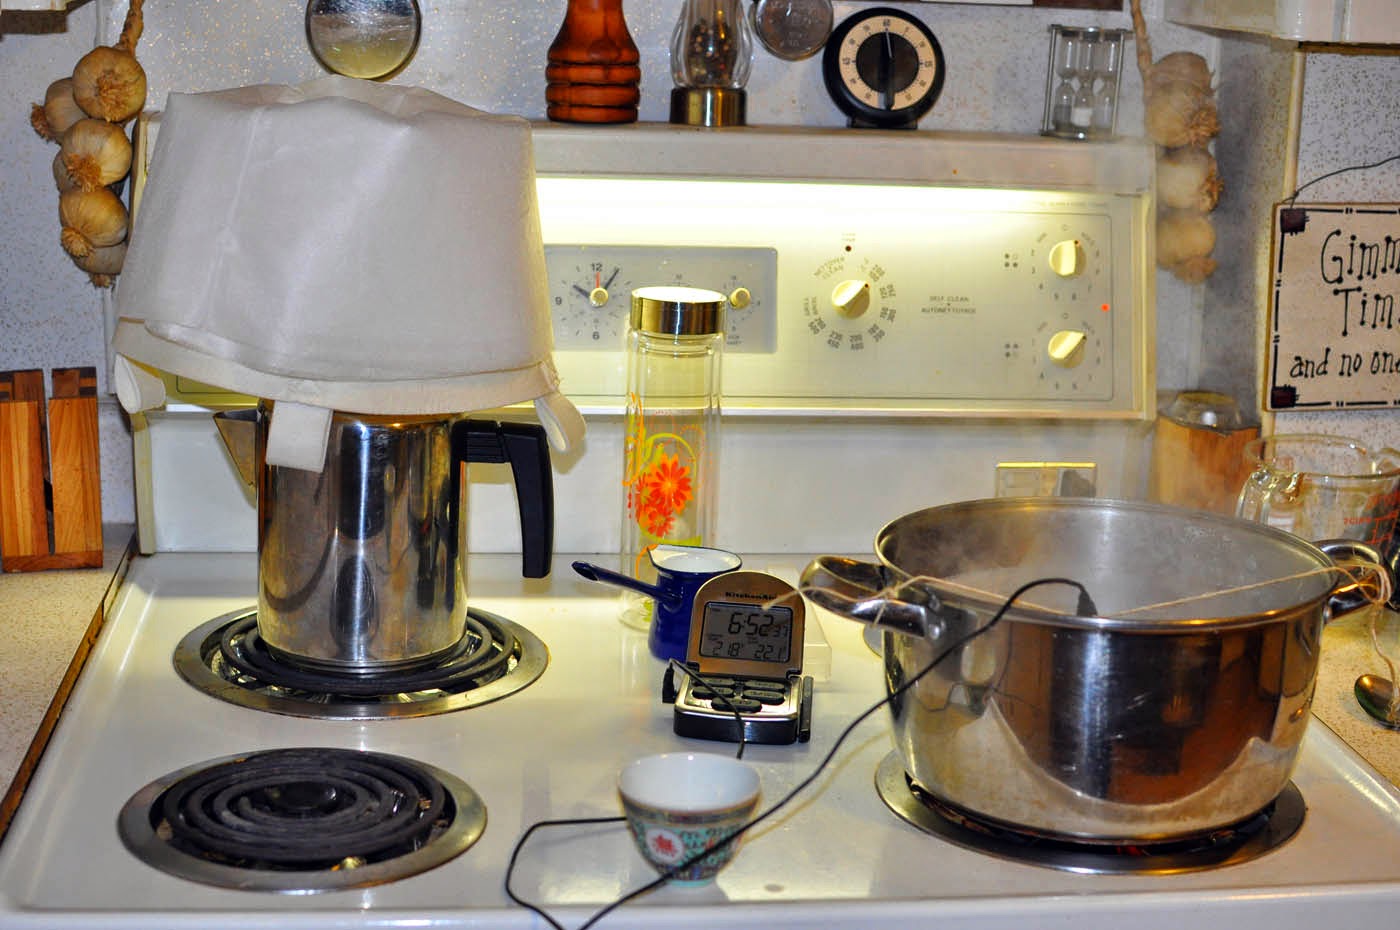
To save money, Jeff and I have improvised on a lot of materials used for making maple syrup.  The tall thin glass container in the center of the picture is a Bios tea infuser, bought at Canadian Tire for around $11.00.  It is double-walled glass, and works perfectly as a hydrometer cup.

Since we make small batches of syrup each time, we have used our stainless steel coffee percolator to filter the syrup into.  This makes for easy pouring into the funnel for the bottles.


The syrup is almost ready.  It is supposed to be ready at 220°F, but I think our thermometer is not calibrated properly because when we brought it to 220 and tested it with the hydrometer, the syrup is not dense enough and has to be boiled longer.  Through trial and error and a few hydrometer readings, we have found that when it reads 221 and starts to jump to 222 that it is done.  For a properly calibrated thermometer however this would be over-done.


The minimum density for the syrup is 59.6 brix at 211°F.  In the photo below the red line represents 59.6 brix.  It has cooled a bit more in this photo, which makes it more dense.  I have a chart that gives the brix reading according to certain temperatures and we like it a bit more than the minimum density.  Below is the final hydrometer test and I'm satisfied it is now dense enough for bottling.


To ensure proper sterilization the syrup must be bottled at a temperature of no less than 180°F.  I try to aim for 185°F.  At about 190°F niter (or sugar sand) will re-form and the syrup will need to be filtered again so we want to make sure that doesn't happen.  You lose a lot of syrup through the filtering process.

I put my bottles and coffee percolator in the oven at 200°F.  That way when we transfer the syrup from the finishing pot to the percolator the temperature drop is minimized.  The filtering takes some time however and the temperature will usually drop below 180°F.  So once the filtering is complete, I put the percolator back in the oven with the thermometer in it and bring it back up to 185°F.  Then I pour it into the bottles, and lay the bottles on their sides for a few minutes to sterilize the caps.  This sterile bottling method means the syrup will keep for about a year if unopened.  Once opened it will keep in the fridge for about six months.

Syrup that is not brought to the minimum density will spoil, and mold can form in the neck of the bottles where there is a small pocket of air.  This can also happen if the syrup is not bottled in a sterile manner as described above.  If the syrup is too dense, sugar crystallization will occur.

Below is is our produce from our fourth boil, 3 1/2 cups of syrup.


Below are samples of our syrup from our second, third and fourth boils.  The syrup gets darker as the season progress.


The temperatures are remaining above zero quite often now so we're not sure if we will be having another boil.  The sap goes "buddy" once the trees start to metabolize the sugar, which produces a very unpleasant bitter taste.  Since we are new to this I don't know if we'll be able to smell or taste the "buddyness" in the sap.


Sunday, April 6, 2014

Making Maple Syrup - Our Third Boil - April 6, 2014

Below is our log for our third week of sap collecting.

April 1 - Ice storm - never got above zero.  No sap collection.  Weather:  High -1.7°C, low -3.7°C
April 2 - Did not collect today as the sap was slow.  Weather:  High +3.7°C, low -3.9°C
April 3 - 59.5 cups + thawed sap previously frozen of 11.5 cups.  Weather:  High +6.2°C, low -0.9°C
April 4 - 86 cups.  Weather:  High +10°C, low -0.5°C
April 5 - 86.25 cups.  Weather:  High +5.4°C, low -0.6°C
April 6 - 17.75 cups.  Weather:  Cold and windy (W and NW wind).  High +5.3°C, low -0.8°C

The grand total for our next boil was 261 cups, or 16.3 gallons.

Here is Mother Nature's idea of an April Fools joke:


Wicked ice storm on April 1st and our backyard Norway Maple lost a few limbs.  A big one hit the clothesline on the way down and pulled the clothesline support out of the house.  Anyway, back to the sugar shack.  The orange bin is our sap storage container, and it has to be kept cool or it will spoil so we pack it with snow.  Packed like this it will be good for about a week.


On April 4th our new sap hydrometer arrived.  I was not able to use the glass syrup hydrometer cup because the sap hydrometer is much bigger.  So Jeff went to Home Hardware and got a piece of PVC pipe cut to size with a cap on the end and it worked perfectly.  

We tested all the trees individually.  Our lowest sugar content came from the tree in our front yard, a Norway Maple (we think).  It is a fairly young tree, and is probably smaller than the recommended size of 10-12" in diameter to be tapped.  On this date the sap of that tree only had 1.5% sugar.  Our best tree was in our neighbour's yard across the street.  Her tree was at 3.1% sugar, and we have one other tree at 3%.  The other trees range from 1.8% to 2.6%.


I also decided to test the sap in the storage container that we had collected before the sap hydrometer arrived.  It tested at 2.1%, so that was pretty good.


As I mentioned in my previous post, I wanted to try and make the propane burner more efficient.  We had some cinder blocks out by the deck so we surrounded the burner with the blocks to help contain the heat.  It helped a little, but not much, as heat was able to escape around the edges of the pan.  It still only boiled off slightly more than one gallon an hour.  We really need a steam pan that is square and completely covers the top of the burner.  

We started the boil on April 5th, and boiled for five hours then shut it down to go to bed.  At midnight we just put the lid on it and called it a day.


The next day, Sunday, we resumed boiling for another 10 hours.  Jeff brought his laptop out to work on video while boiling.  The smaller pot is our "pre-heater" for sap.  The cold sap from the bin is first heated on a small propane one-burner stove before it is transferred to the big pan.  That way there is no pausing of the boiling in the big pan - it is a continuous rolling boil.


I put a couple of rocks I had in the yard up against the open side of the burner to try and help insulate it a bit more.


After ten hours of boiling outdoors, it is brought inside and transferred to the finishing pot.  It's really starting to look and smell like syrup now.


 When it has reached a temp somewhere between 220 and 221, we take it off the heat and do a hydrometer test.  This time I heated the hydrometer cup in the oven to maintain the hot test temperature of 211.  It is measuring right at 59 brix which is considered done but not as "done" as I would have liked.  But rather than risk overdoing it, we're calling it done.


This boil produced about 6.3 cups of syrup, but again we had issues with filtering where we lost a bunch.  After filtering through the Orlon filter and pre-filter I could still see sugar sand (niter) suspended in the syrup.  So we tried running it through coffee filters.  It plugged up too quickly so we had to re-filter it through the Orlon and pre-filter again.  We lost so much syrup in the filters!  And then after the fact, I read on a maple sugaring forum that you are supposed to dampen the Orlon filter first so it doesn't absorb so much syrup.  Damn!  

And despite all of our filtering and loss of syrup, there was still niter suspended in the syrup.  I also read after the fact that it is nearly impossible to remove all the niter with gravity filters.  The only way to remove it all was with commercial filter presses which are very expensive and not for the hobbyist (unless you have lots of money).  Most hobbyists just let the niter settle to the bottom and in about a week the syrup will look clear.  The niter is harmless...the syrup just looks nicer without it.  Our first batch didn't have it because early season sap has less niter and what was there was caught by the coffee filter.  Niter increases as the season progresses though, and it is also what gives the syrup a darker colour and stronger maple flavour.

So after all that, this is what we were left with.  Our second boil syrup is the lighter-coloured one on the left (1 cup).  The next bottle which is slightly darker is from this boil, also 1 cup.  The little bottle was leftover (2/3 cup), and the large bottle is 2 cups.  So we lost about 2.5 cups of syrup in the filtering fiasco.  Now we know...filter once, do not obsess about niter. lol 


We had the syrup from the little bottle on our waffles for breakfast and it was yummy.